The FlatfileButton Settings Property
In the previous getting started guide, the settings property is used with a minimal configuration. The only required keys for this settings object are type and fields, but there are more settings that while optional, do provide better data cleaning and user experience.
type
| Type | string |
|---|---|
| Required | |
| Description | This option refers to the type of import you have, and can be quite helpful if you are importing different things within different parts of your application. For example, you have a client import aspect where your clients can upload products and then also an internal import process for importing company onboarding information for new clients. Using type, you are able to differentiate between the "products" and "company" import types. |
fields
This is where you will define your schema or data model that you want to receive in your application.
| Type | [ { label: string, key: string, ... }, ... ] |
|---|---|
| Required | |
| Description | The field guide will take you into more details about the options for fields, but what you need to know is that fields is an array of objects. Each object will be a new field and at a minimum must have a label and key as keys in the object. |
title
Pass an optional title to the Flatfile Importer page.
| Type | string |
|---|---|
| Default | Bulk add type |
| Description | Replaces the primary header text when the importer is first launched. For example, title gets set to, "We hope you are enjoying Flatfile." You would see that title appear in the importer like in the screenshot below. |
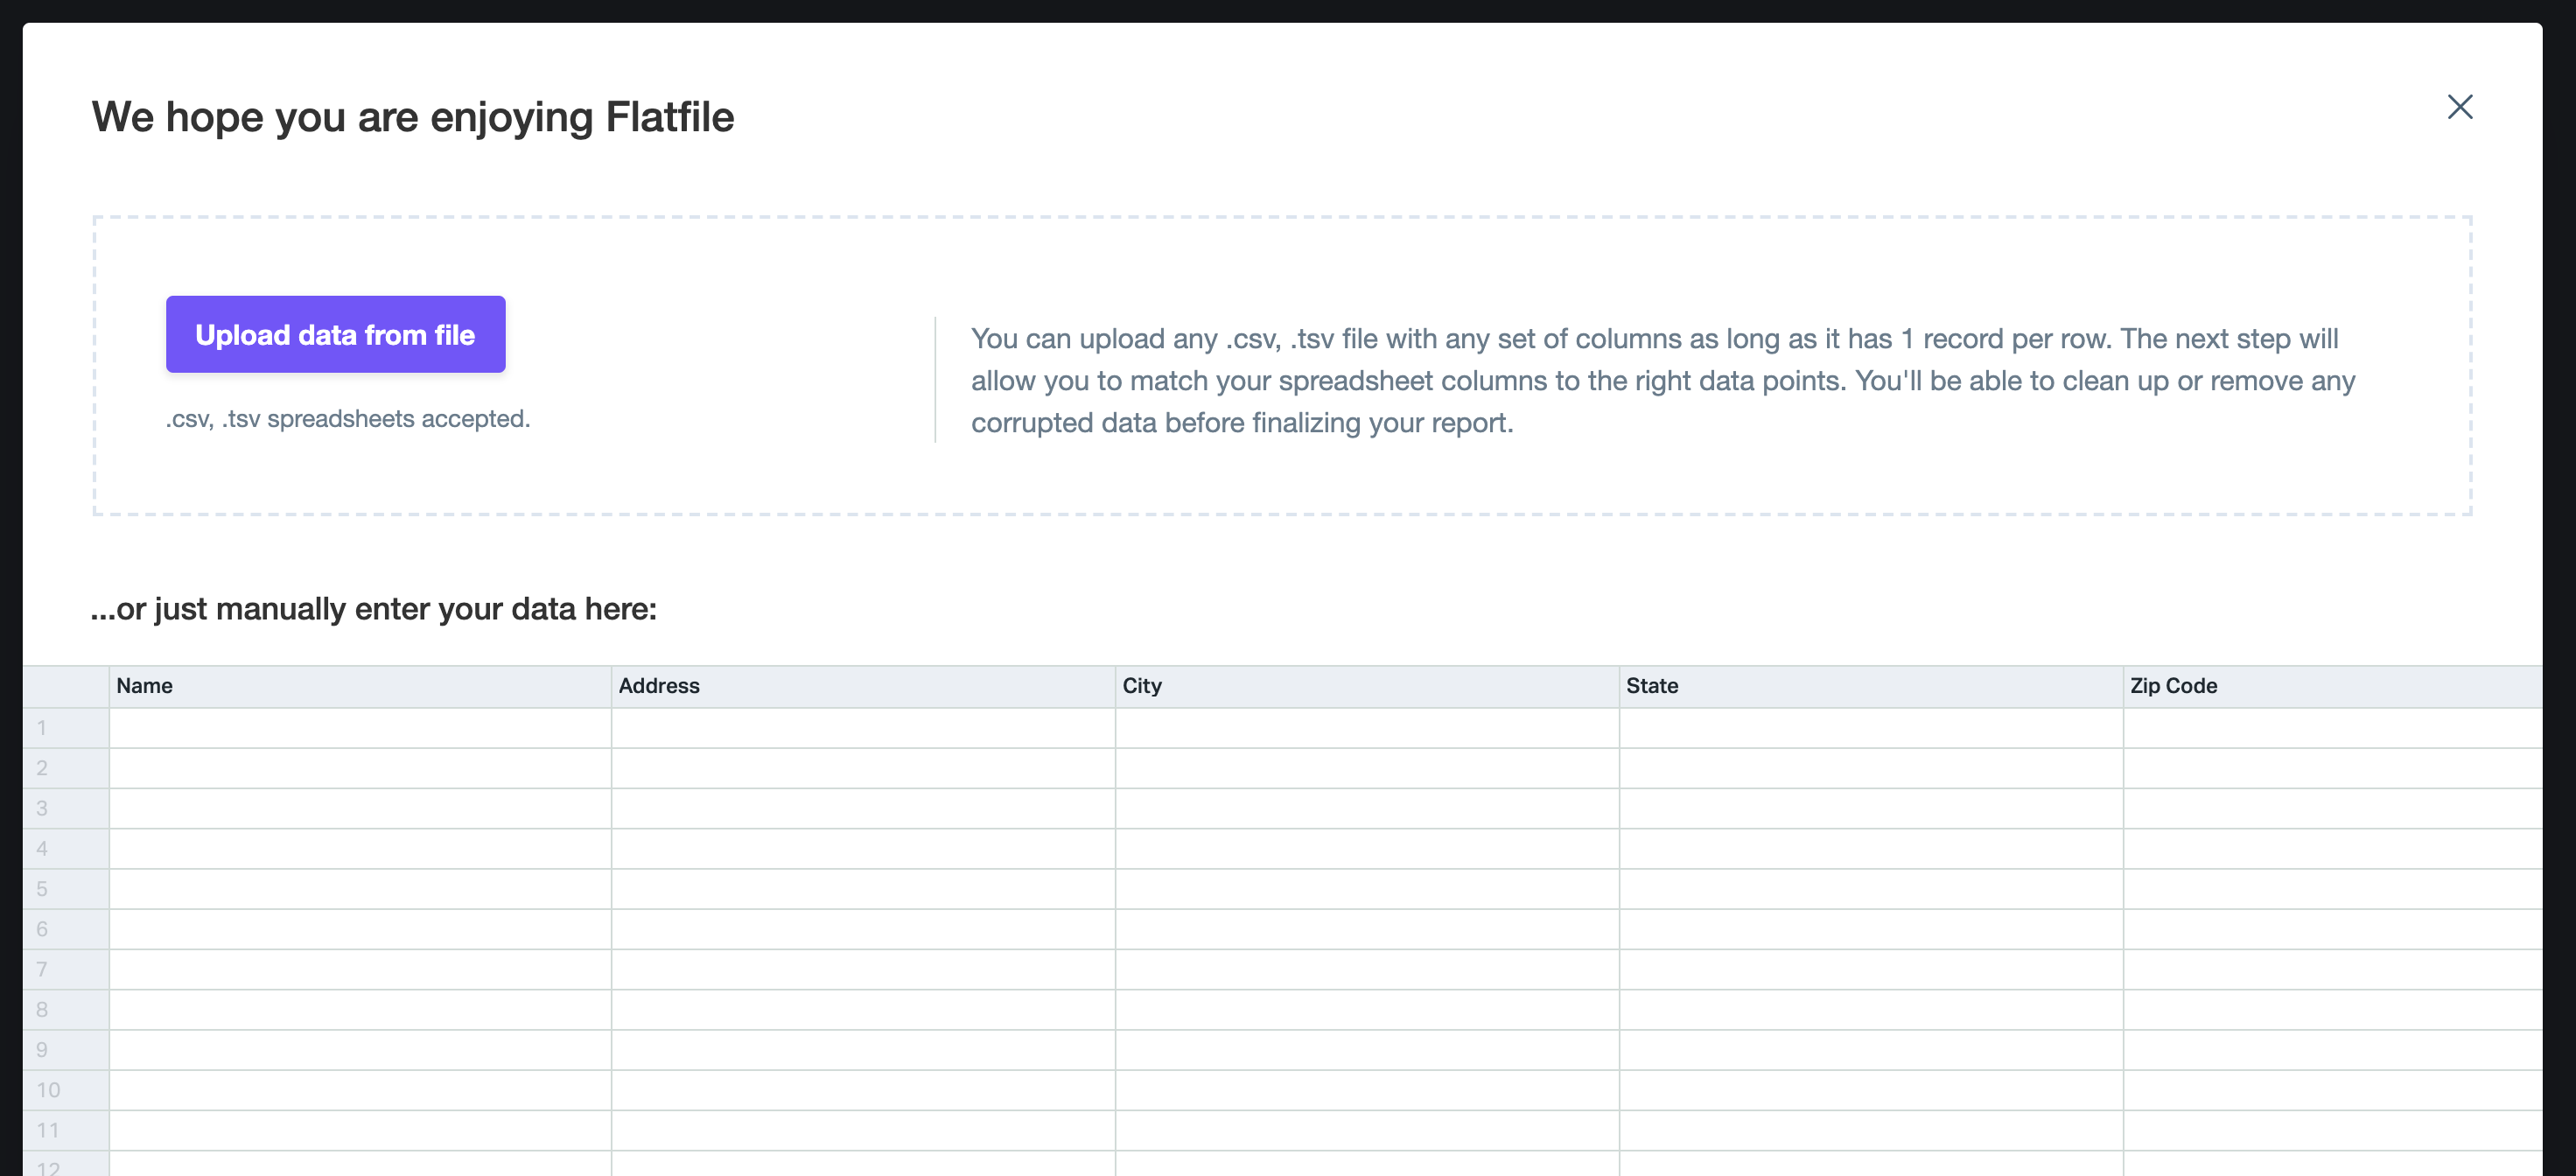
The default for this will display 'Bulk add ' and then the value of the type key. So if the type is type: 'products' , it will say 'Bulk add products'.
allowInvalidSubmit
| Type | boolean |
|---|---|
| Default | false |
| Description | While this key might suggest that it will either allow or not allow a user to submit with errors in the data, the difference here is solely in the messaging provided to the user. In both cases, FlatfileResults will be the same (having allData and validData among others as options) and you can proceed how you see fit. |
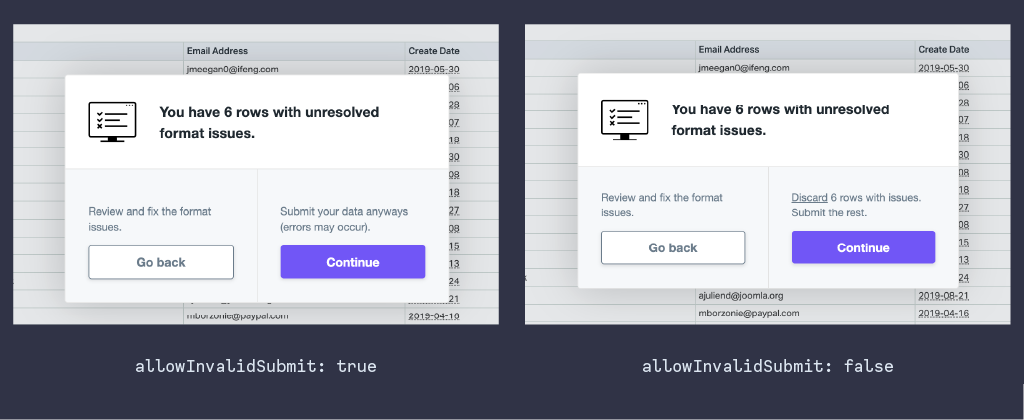
This messaging is on the final screen before submitting that reminds the user there are still invalid records. When this is set to false the user will see 'Discard x rows with issues. Submit the rest.' When this is set to true the user will see 'Submit your data anyway (errors may occur).
autoDetectHeaders
| Type | boolean |
|---|---|
| Default | false |
| Description | This controls whether the header selection step should be skipped if our auto-detection is able to detect the headers. |
managed
Control whether or not your data can be processed server-side or needs to be handled completely in the browser.
| Type | boolean |
|---|---|
| Default | false |
| Info | If you would like to have access to our dashboard and be able to see your files that are being uploaded there, then this will need to be set to true. This will also need to be set to true if you plan to have xml or excel files processed as these are generally too much to be handled in the browser. |
If you need to process excel files, but aren't sure about having that handled on a server other than your own, check out our security qualifications or start a conversation with us about our on premise solution by emailing support@flatfile.io.
webhookUrl
Provide a URL for sending data via webhook.
| Type | string |
|---|---|
| Default | null |
| Info | If you would like to process your data via webhook, you can add your webhook URL to this setting and the imports will be sent to your endpoint as they finish processing. Do note that we send the payload to your webhook URL in chunks of 1000 to cut down on the size of data being sent. |
In order for the webhookUrl setting to work properly, you must also set the above managed setting to true.
disableManualInput
This setting allows for showing or hiding the manual input table that appears when the importer is started.
| Type | boolean |
|---|---|
| Default | false |
| Info | If this is set to true , then there will only be a dropzone on the page with the manual input table being hidden. |
forceManualInput
| Type | boolean |
|---|---|
| Default | false |
| Info | In contrast to being able to disable the manual input table, you can also force the users to use the manual input table by disabling the dropzone. When set as true, this will hide the dropzone and only display the manual input table. |
allowCustom
Allow users to submit fields not included in your config as a custom field.
| Type | boolean |
|---|---|
| Default | false |
| Info | If you would like for users to be able to add a field when submitting their data, then allowCustom should be set to true . In order to add a custom field, the user would need to type in the desired field name for the data in the matching phase. |
maxRecords
Specify the maximum number of records that a single file can import.
| Type | number |
|---|---|
| Default | null |
| Info | This value does not include the headers of the file. So if the number of records in a file goes to row 21, but the first row is headers, then this file would be considered to have 20 records in it. |
devMode
Set the importer as being in development mode.
| Type | boolean |
|---|---|
| Default | false |
| Info | This option is important for both testing and in any development environments you have established. If this value is set to true, the importer will show a "development mode" banner at the bottom, and the imports will be flagged as development imports. These imports will not be charged against your account. |
ignoreColumns
Provide a list of column names to automatically ignore when present in a file.
| Type | [string] |
|---|---|
| Default | null |
| Info | Portal will automatically flag any columns with corresponding names provided in this array as ignored in the matching stage when these are provided. Unlike when a field is ignored by the user, however, this prevents them from being matched at all by your end user. |
i18nOverrides
Sets custom text in multiple locales for the importer.
| Type | i18nOverrides object |
|---|---|
| Default | null |
| Info | The i18nOverrides setting allows you to override the text in the importer with your own custom text in as many of the locales offered within the importer. By providing one or more locales with one or more keys, you will see your own custom text appear in the importer. We have an entire guide for working with this feature here. |
theme
Style the Importer to match your brand.
| Type | object |
|---|---|
| Info | This allows for customization of the appearance of the importer. This allows you the freedom to theme the importer to be in line with your branding. |
Because of the nature of our product, using your own CSS to override ours is not only against the terms of use, but also can cause bugs. For that reason, we have limits on what we can and can't style in the importer.
For more information on all the different keys for themes and their user, visit the themes documentations.
theme: {
    global: {},
    buttons: {},
    progressBar: {},
    header: {},
    footer: {},
    dropzone: {},
    manualInput: {},
    headerMatch: {},
    columnMatch: {},
    dialog: {},
    datasource: {},
    loader: {},
    iterator: {},
}
The above are the available theme keys. For more information on what each key controls and how to use it, visit our theming documentation.
integrations
| Usage | { adobeFontsWebProject?: string, googleFonts?: string } |
|---|---|
| Info | This allows for using Adobe Web Fonts or Google Fonts within the importer. |
To use with Adobe Web Fonts, use the adobeFontsWebProject key with the typekit ID as a string value. To use Google Fonts, you need to pass in the specific font family you want to use into the googleFonts key. You can grab this by selecting the specific font you wish to use in the Google Fonts picker and then copying everything after the = in the family query paramter in the URL. Example would be copying everything in bold below and putting in the key as a string in the code example below.
Google Font URL: https://fonts.googleapis.com/css2?family=Roboto:ital,wght@0,100;0,300;0,400;0,500;1,100;1,300;1,400;1,500&display=swap
// Adobe Fonts
integrations: {
  adobeFontsWebProjectId: "Project_ID";
}

// Google Fonts
integrations: {
  googleFonts: "Roboto:ital,wght@0,100;0,300;0,400;0,500;1,100;1,300;1,400;1,500";
}
This only makes the font available. You'll still need to set your font family in the theme config.