CLI quickstart
Create and deploy a working Flatfile example.
To use this guide, you must be familiar with the terminal and bash commands, and have Node 16 or higher installed.
Video walkthrough
Create a Flatfile Account
Sign up with Github or login if already registered.
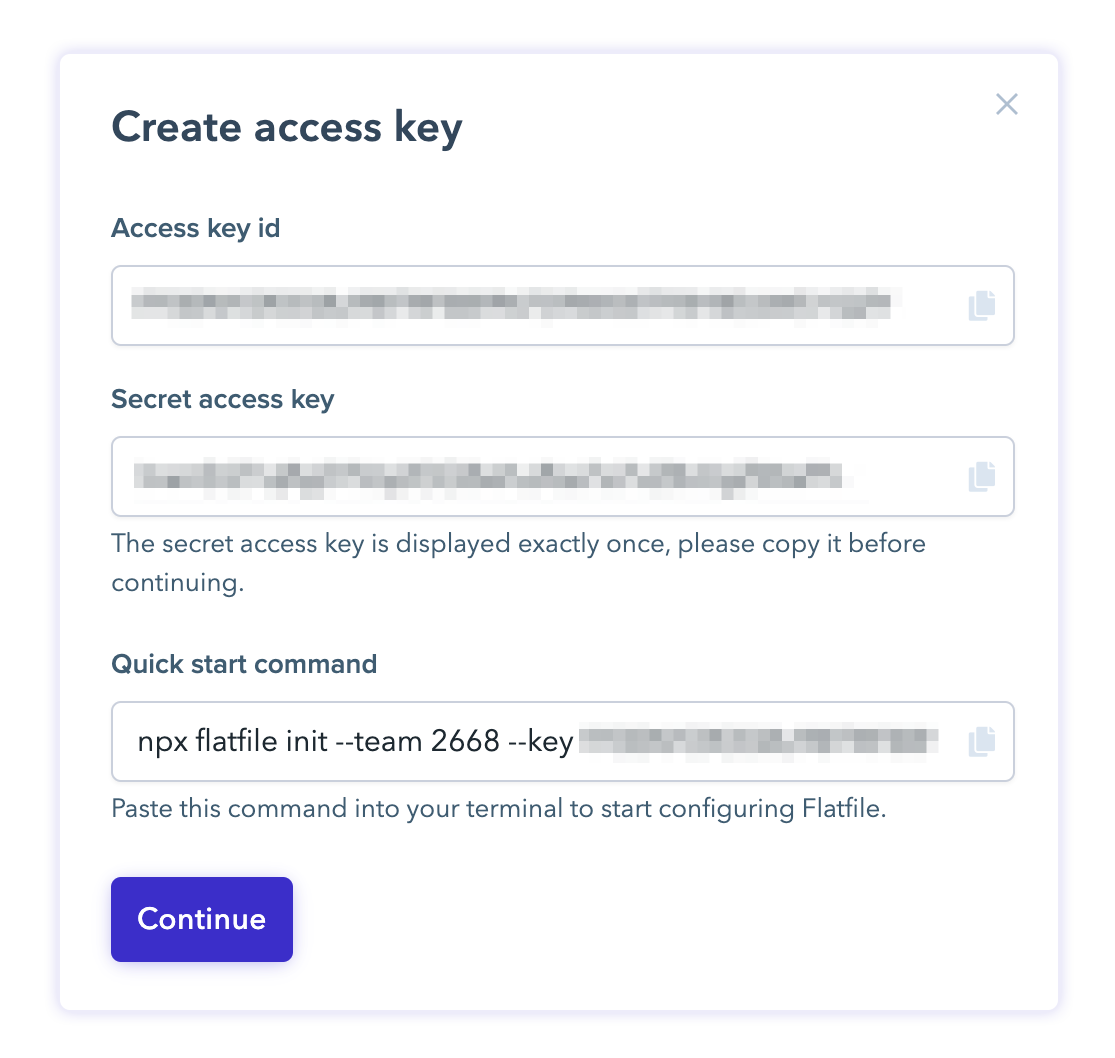
Go to your Flatfile dashboard and create an API access key and secret. Once you create an access key, copy the terminal command at the bottom of the dialog:
Initialize a project
The following terminal commands require Node 16 or higher.
Run the terminal command you copied in the preview step, replacing "flatfile-workbook" with your desired project name:
npx flatfile init --team 2668 --key <access key> --secret <secret> --environment test --name "flatfile-workbook"
Alternatively, you can enter the information manually by running:
npx flatfile init
And following the command line prompts to enter:
- Project name - the name of the directory that is created
- Your API Access Key - create and manage here
- Your API Access Secret - create and manage here
- Your Team ID - Found in your address bar when logged in. If your TeamID is 12345, you would see https://app.flatfile.com/a/12345/
- Environment Name -
testfor Developer Mode orprodfor production. Recommendtestto start.
Need to install the following packages: flatfile Ok to proceed? (y)Please signup or login to Flatfile Dashboard with Github.
https://api.flatfile.io/auth/github
Please name your project: flatfile-workbook
Your API key (found in Flatfile Dashboard): [key goes here]
Your API secret (found in Flatfile Dashboard): [secret goes here]
Your Team id (found in Flatfile Dashboard): [Team ID goes here]
Environment name (test | prod): test
Success! Created flatfile-workbook at /flatfile-workbook
Start updating your workbook at flatfile-workbook/src/index.ts
Inside that directory, you can run several commands:
Inside that directory, you can run several commands
npm run test
Start the test runner
npm run lint
Lint and fix files
npx flatfile publish
Deploy your workbook
Optionally, preview an example at: flatfile-workbook/examples/workbooks/FullExample.ts
You can deploy an example by passing a file path to the publish command. For instance:
npx flatfile publish ./examples/workbooks/FullExample.ts
Publish example workbook
Your Access Key, Secret Key, and Team ID that you provide are stored in a .env file at the root of your project. If you want to use a different Access Key or deploy to a different account, modify those variables.
Configure your workbook
Inside your newly created project, open up the src/index.ts file. This contains a basic, fully functional template which you can configure or publish right away.
See the Workbooks guide to learn how to configure Flatfile. Or, go ahead and publish the starter template if you want to see it live.
Deploy
In the terminal, from your project directory, publish your workbook to your Flatfile account:
npx flatfile publish
This will publish your Workbook defined at src/index.ts to your account based on variables set in your .env file.
For example, if you publish the src/index.ts as-is with the test environment, then you can expect to find a Template (same as a Sheet) called MySheet here and a Portal called MyPortal here.
If you don't see your Sheet and Portal, try using the toggle in the bottom left of your screen to change your environment.
You can also use the direct links provided in the command line output to view your published Sheet and Portal:
✔ Workbook created with id 182208
🎉 Deploy successful! 🎉


┌ Summary ────────────────────────────────────────────────────────────────────────────────────────────────────────────┐
│                                                                                                                     │
│   TEAM:        2668                                                                                                 │
│   SCHEMA:      182208                                                                                               │
│   ENVIRONMENT: test                                                                                                 │
│                                                                                                                     │
│   View your schema at https://app.flatfile.com/a/2668/env/test/templates/182208                                     │
│   PORTALS:                                                                                                          │
│             name:      MyPortal                                                                                     │
│               id:      951adc97-d1b0-454d-9b75-1cdb480ec630                                                         │
│              url:      https://app.flatfile.com/a/2668/env/test/setup/embeds/951adc97-d1b0-454d-9b75-1cdb480ec630   │
│                                                                                                                     │
└─────────────────────────────────────────────────────────────────────────────────────────────────────────────────────┘
See related guides on Testing and Deploying for details about publishing to Flatfile.
Try it out!
You're now ready to start importing data with Flatfile! Navigate to your Portal in your dashboard and click the "Test" button. We've provided a sample file in your starter project at examples/sample-uploads/my-sheet-sample.csv you can use to test the import flow. After you finish importing, you should see the data appear in the "Imports" section of your dashboard.
See our guides on embedding Portals in your application and accepting imported data to learn more.