Embedding Flatfile
Integrate Flatfile within your product using a Portal.
Highlights:
- Embed Flatfile with an SDK
- Secure your import
- Trigger an import
- Customize look and feel
- Environment Variables
Video walkthrough
Embed a Portal
You can embed a Flatfile data exchange experience inside your own product with a Portal.
Think of integrating a Portal in four parts
- Include
@flatfile/sdk - Pass in a user session (Production requires this through a secure JWT token)
- Trigger an import with
Flatfile.requestDataFromUserthat launches a Portal - Provide a way for the user to initiate that import trigger
Preview examples below of code for both Developer mode and Production
Specific implementation syntax will vary depending on your programming language.
Developer mode example
Review inline comments that explain parts of this embed code snippet
Install the dependency
npm install @flatfile/sdk
Implement in your code
// 1. include the @flatfile/sdk  is installed with npm install @flatfile/sdk
import { Flatfile } from "@flatfile/sdk";

// 2. Pass in your EMBED_ID
const EMBED_ID = "8074403f-d214-4a77-bc45-b181631eb6db";

// 3. a function to trigger `Flatfile.requestDataFromUser` to launch a Portal
export function importData() {
  Flatfile.requestDataFromUser({
    // Development mode = embedId, user, org.
    embedId: EMBED_ID,
    user: { id: 99, name: "John Doe", email: "john@doe.com" },
    org: { id: 77, name: "Acme Inc." },
    // handle submitted data
    onData(chunk, next) {
      // do something with the data
      console.log(chunk);
      // call next() to proceed with the import
      next();
    },
    onComplete() {
      console.log(`Import complete`);
    },
    onError(error) {
      console.error(error);
    },
  });
}

// 4. A way for the user to initiate that import trigger
document.querySelector("#flatfile-button").addEventListener("click", async () => {
  console.log("click");
  await importData();
});
<html>
  <head>
    <title>Flatfile Portal Example - Javascript</title>
    <meta charset="UTF-8" />
  </head>
  <body>
    <div id="app"></div>
    <button id="flatfile-button">Import Data</button>
    <script src="src/index.js"></script>
  </body>
</html>
Production mode example
Notice embedId, user and org has been replaced with a secure JWT token.
Click here or scroll below to see a full list of options for Flatfile.requestDataFromUser .
export function importData() {
  Flatfile.requestDataFromUser({
    token, //this is a signed JWT token. See Secure section in the guides below
    // handle submitted data
    onData(chunk, next) {
      // do something with the data
      console.log(chunk);
      // call next() to proceed with the import
      next();
    },
    onComplete() {
      console.log(`Import complete`);
    },
    onError(error) {
      console.error(error);
    },
  });
}
Secure a user session
Secure imports for your customers with server-side authentication using a JSON web token (JWT).
The token has the following parameters:
{
  "embed": "Your portal embed id",
  "user": {
    "id": 1,
    "email": "max.blank@flatfile.io",
    "name": "Max"
  },
  "org": {
    "id": 1,
    "name": "Flatfile"
  }
}
Sign the JWT with a HS256 algorithm using the Portal private key (found in your Flatfile Dashboard)
Here is an example how of you would sign a JWT token with Node. Many programming languages and frameworks have libraries to sign JWT tokens.
const express = require("express");
const app = express();
const jwt = require("jsonwebtoken");

// This is a public Embed ID and a private key.
// Private key should be used to sign a JWT.
const EMBED_ID = "5265032a-5988-4004-a77c-a2390088f945";
const PRIVATE_KEY = "YOUR_PRIVATE_KEY";

app.use(express.static("public"));
app.use(express.json());

app.post("/auth-flatfile", async (req, res) => {
  // Replace this constant with current user's information.
  const user = {
    id: 1,
    email: "max.blank@flatfile.io",
    name: "Max",
  };
  // Replace this constant with current user's company infromation.
  const org = {
    id: 1,
    name: "Flatfile",
  };
  const token = jwt.sign(
    {
      embed: EMBED_ID,
      user,
      org,
    },
    PRIVATE_KEY,
    {
      expiresIn: "24h", //expires in 24 hours
    },
  );

  res.send({ token });
});

app.listen(4242, () => console.log("Node server listening on port 4242!"));
Now fetch and return the JWT from your server with a callback function inside `token` on your Portal embed logic.
Example:
Flatfile.requestDataFromUser({
  token: async () => {
    const response = await fetch("/auth-flatfile", {
      method: "POST",
      headers: { "Content-Type": "application/json" },
    });
    const { token } = await response.json();

    return token;
  },
  onData: (chunk, next) => {
    // Do something...
    chunk.records.forEach(console.log);
    next();
  },
});
Trigger an import
This is the part of the Client SDK that launches a Flatfile Portal.
Flatfile.requestDataFromUser({
  // See Options list
});
The following sections explain the options available to Flatfile.requestDataFromUser and when to use them.
Options
| Property | Type | Description |
|---|---|---|
| token | Optional, JWT or Callback | Pass a signed JWT or callback that returns a Promise with a JWT (eg. fetch from API). |
| embedId | Optional, UUID | If you're in development mode, you can pass your EmbedID without any token. |
| user | Optional, object | {id, email, name} |
| org | Optional, object | {id, name } |
| chunkSize | number, default: 1000 | The number of records to process at once. |
| chunkTimeout | number (ms), default: 3000 | Allowed processing time per chunk before erroring. |
| autoContinue | boolean, default: false | When true, automatically continue the most recent in progress import. When false, users are given the choice to continue or start over. |
| customFields | object | You can provide user-defined custom fields at runtime (string only) |
| open | "iframe" or "window", default: "iframe" | Whether to open the importer in a new window or an iFrame overlay in the existing page. |
| mountUrl | Optional, URL | Used only for on-prem implementations. |
| apiUrl | Optional, URL | Used only for on-prem implementations. |
| theme | Optional, object | Customize the look and feel of the Portal |
customFields
Using this feature you can easily pre-set custom fields that are not defined in the underlying template. This is helpful for user-defined fields that have already been set up in your application. Note: this feature requires that allowCustomFields is enabled on the template.
You cannot define custom fields that have the same field key as a core template defined field.
{
  customFields: [
    {
      field: "foo",
      type: "string", //only `string` custom fields are supported. Use data hooks for more advanced validation or formatting
      label: "Custom Field Foo",
    },
    {
      field: "bar",
      type: "string",
      label: "Custom Field Bar",
    },
  ];
}
preventUserDefinedFields
This feature enables you to define custom fields in your Flatfile Portal configuration without allowing users to add their own custom fields during the import process. Since the custom fields Flatfile Portal option requires allowCustomFields to be enabled on the template, this additional option will ensure that the only custom fields that can be used are the ones defined with the customFields object.
{
  customFields: [
    {
      field: "foo",
      type: "string",
      label: "Custom Field Foo",
    },
  ],
  preventUserDefinedFields: true,
}
token
If you pass a callback function, the SDK will execute this when it needs to obtain a token (usually upon the user clicking a button in your application to start importing data).
{
  token: async (): Promise<string> => {
    // customize this to match your response payload
    const res = await fetch("https://your-api/auth-flatfile");
    const data = res.json();
    return data.jwt;
  };
}
{
    token: function () {
        return fetch("https://your-api/auth-flatfile").then(function (res) {
            const data = res.json()
            return data.jwt
        })
    }
}
onInit
This is invoked whenever a new import batch is initialized. There are two places this can happen:
- When a user initially begins an import session
- If the user decides to cancel or start over
If you are doing anything that references the specific batch, workspace, or workbook that is being used for the import, then you must put that logic here. Particularly this is the only place you should set environment variables which are attached to each import session independently.
{
    onInit({session, meta}) {
        // Meta contains: {
        //   batchId, workspaceId, workbookId, schemaIds, mountUrl
        // }

        // example usage:
        session.updateEnvironment({ foo: 'bar' })
    }
}
onData
When a user completes an import we'll begin streaming this data to you in chunks. Generally, you will post these records to an API on your server and confirm they're accepted. If you anticipate records being rejected by your server, you can configure passing rejected records back to Flatfile as a PartialRejection in this section.
{
  onData: async (chunk, next) => {
    const records = chunk.records;
    await doSomeApiWork(records);
    next();
  };
}
Even if you do not plan to process data client-side, you should still include an onData function that calls next() to enable the default submit behavior.
onComplete
This is called after all the data is accepted or dismissed.
You can do things like display a celebratory message or route your user to the next step of your workflow here.
{
    onComplete() {
        // do celebratory things
    }
}
If you do not include an onComplete function, then the importer will remain open by default after the user clicks the "Submit" button.
onError
You can build your own custom error handler to make sure users see errors in your applications' preferred UI. If you do not provide anything here, Flatfile will trigger a basic alert with the error.
{
    onError(err) {
        // err.userMessage - user friendly message
        // err.debug - an error message only intended for you as a developer
        // err.code - a short code such as "FF-UA-01" that we recommend
        //            always including in messages to your user to expedite debugging
    }
}
Customize look and feel
There are several ways to customize your Portal and make it look and feel like a part of your application.
Attach to a custom element using mountOn
By default, the Portal iframe will be appended at the end of your page's <body> element. Use the mountOn option to attach the Portal iframe to any element on the page.
If you use the mountOn option to attach the importer to a specific container, make sure you include custom CSS to style the iframe like in the example below.
<html>
  <head>
    <script src="https://unpkg.com/@flatfile/sdk@^2.0.0/dist/index.js"></script>
    <script>
      function importData() {
        Flatfile.requestDataFromUser({
          embedId: "EMBED_ID",
          // You can use any CSS selector.
          mountOn: "#custom-container",
        });
      }
    </script>
    <style>
      #custom-container iframe {
        width: 100%;
        height: 90vh;
      }
    </style>
  </head>
  <body>
    <button id="flatfile-button" onclick="importData()">Import Data</button>
    <div id="custom-container"></div>
  </body>
</html>
Use theme for more options
The theme option contains custom logo, text, and other settings for your importer:
<html>
  <head>
    <script src="https://unpkg.com/@flatfile/sdk@^2.0.0/dist/index.js"></script>
    <script>
      function importData() {
        Flatfile.requestDataFromUser({
          embedId: "EMBED_ID",
          // See table below for more info on theme options
          theme: {
            logo: "URL_TO_YOUR_CUSTOM_LOGO",
            hideConfetti: true,
            loadingText: "Custom loading text ...",
            submitCompleteText: "Custom submit text ...",
            displayName: "Display Name",
          },
        });
      }
    </script>
  </head>
  <body>
    <button id="flatfile-button" onclick="importData()">Import Data</button>
  </body>
</html>
theme options
| Property | Type | Description |
|---|---|---|
| logo | String | A URL of your logo to appear on the final screen |
| hideConfetti | Boolean | Set to true to hide the default confetti animation when import is completed |
| loadingText | String | Specify the text when loading |
| submitCompleteText | String | Specify text for when upload is complete |
| displayName | String | The display name on Portal |
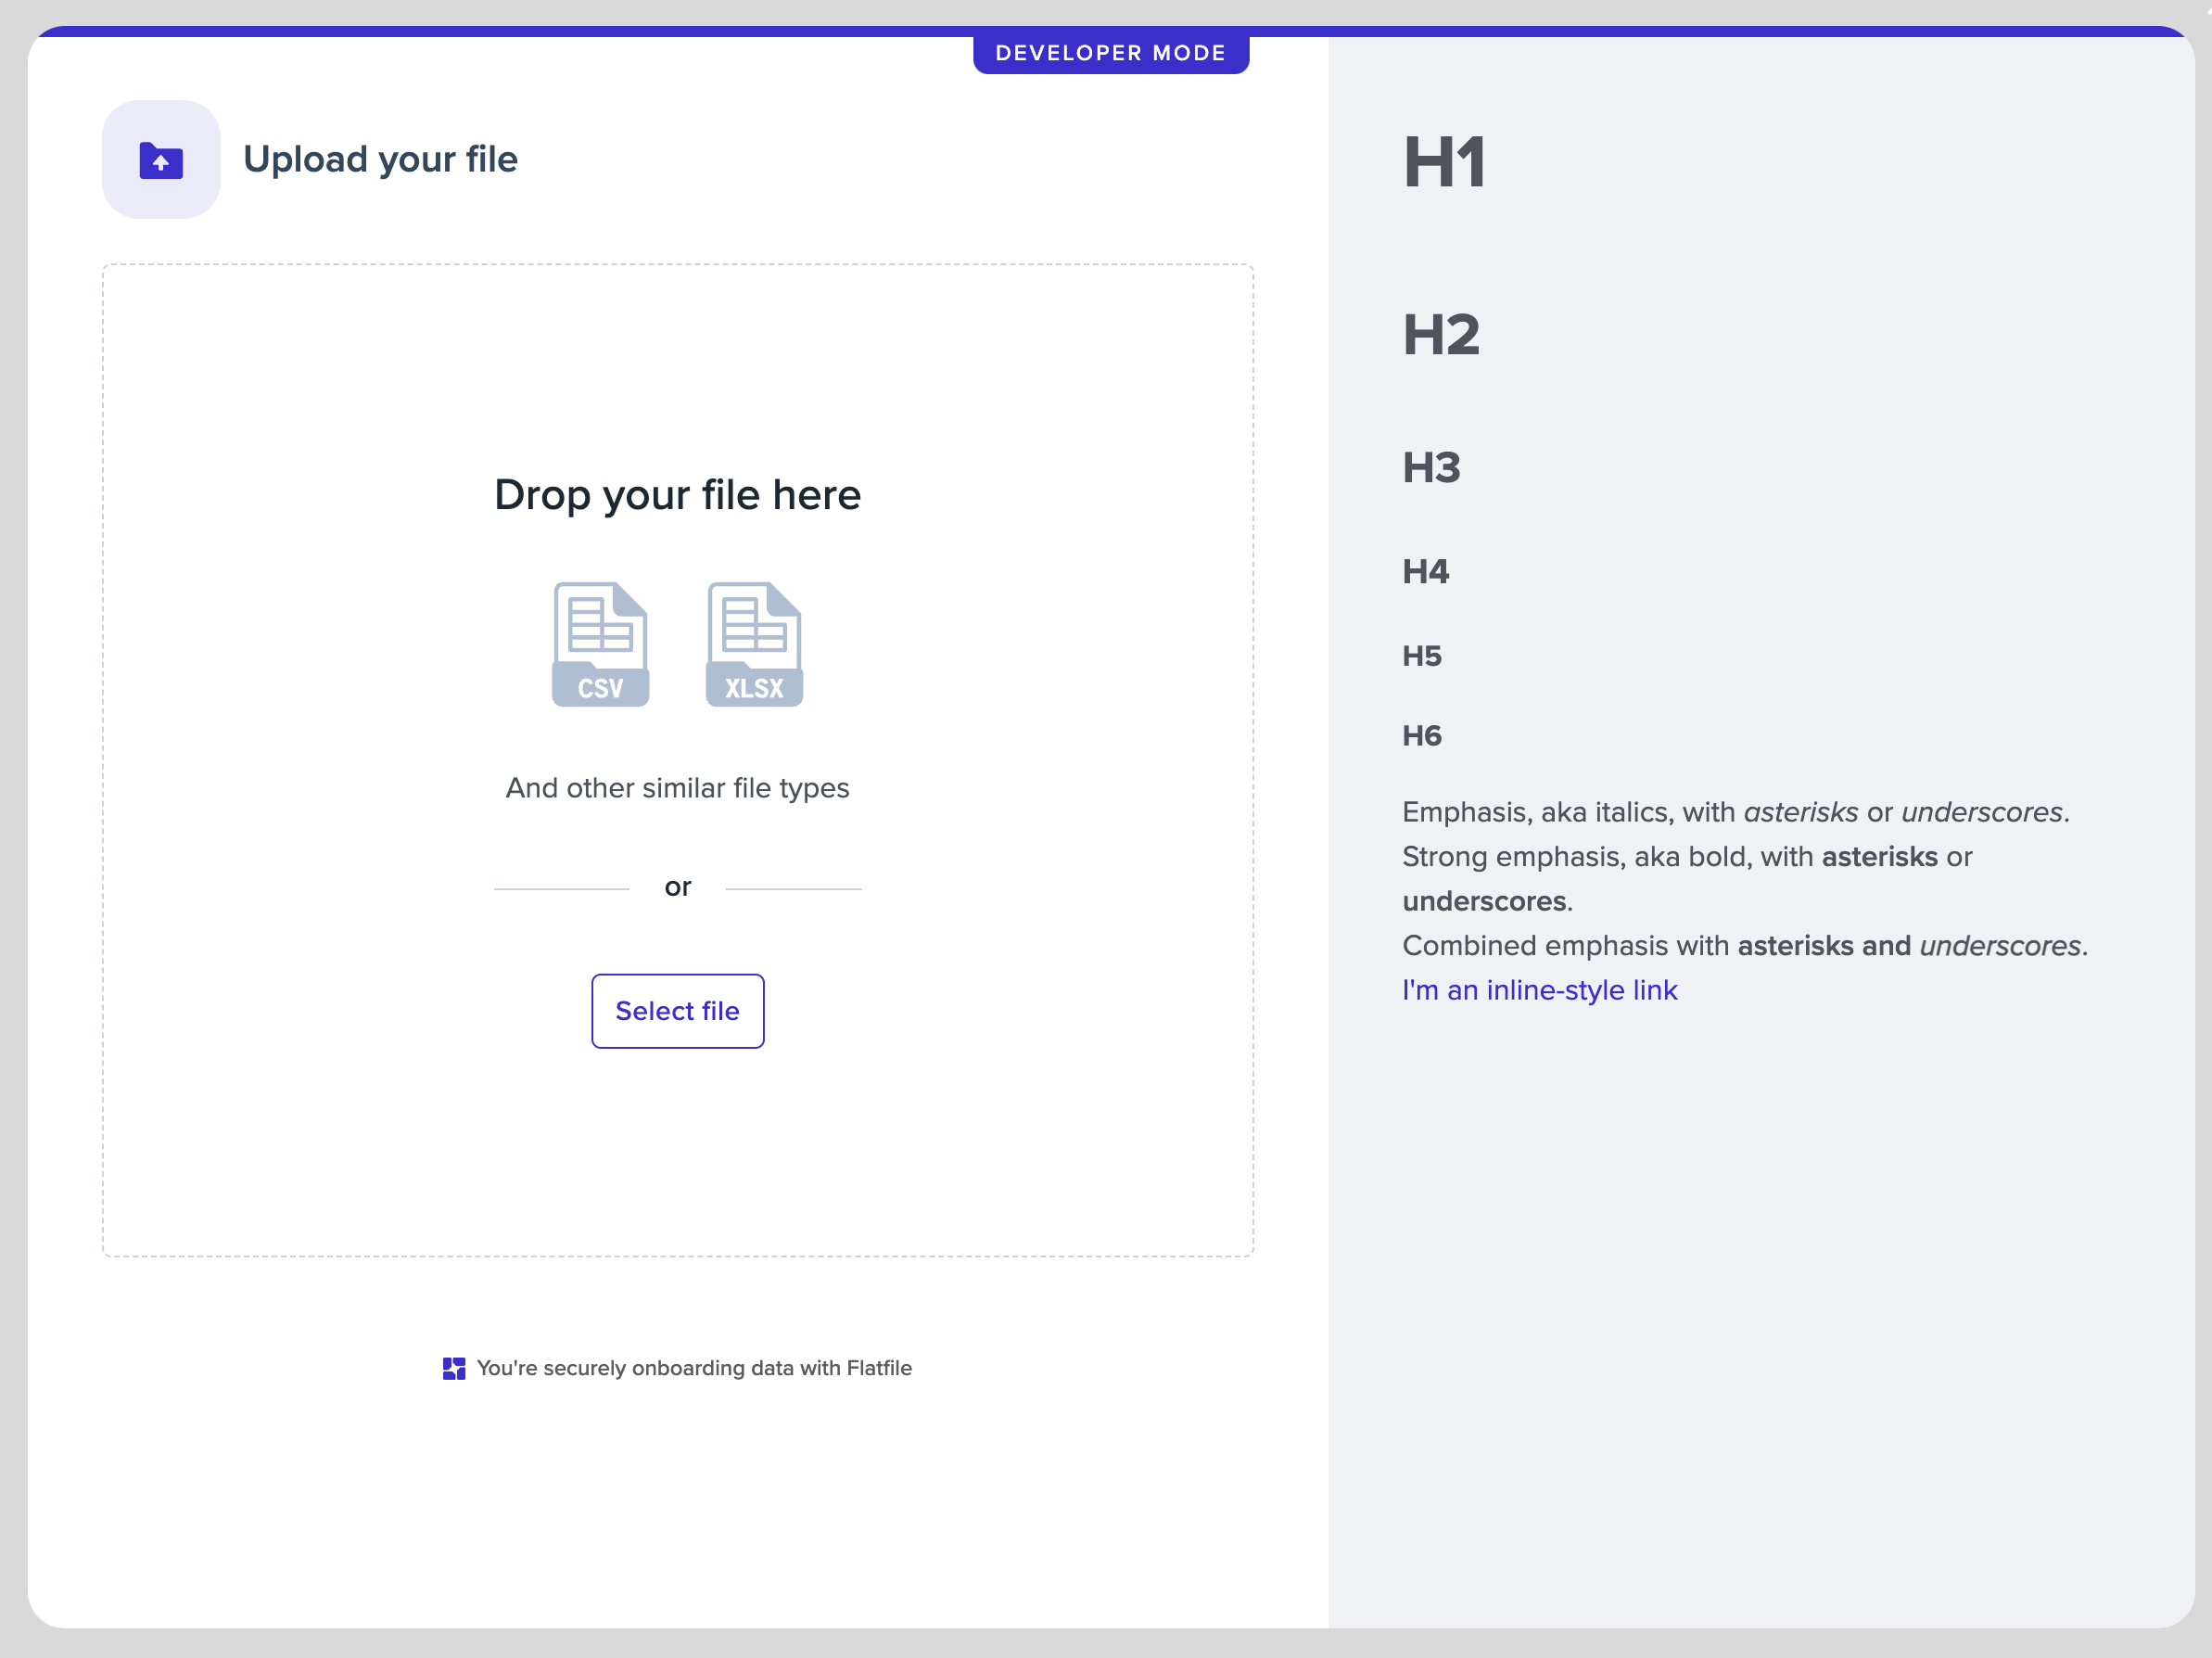
Help content
You can provide custom help content to guide your users that will appear on the right side of your importer. Any type of markdown can be included. You can provide this content on the Edit page for your Portal in the dashboard. See this article for more information.
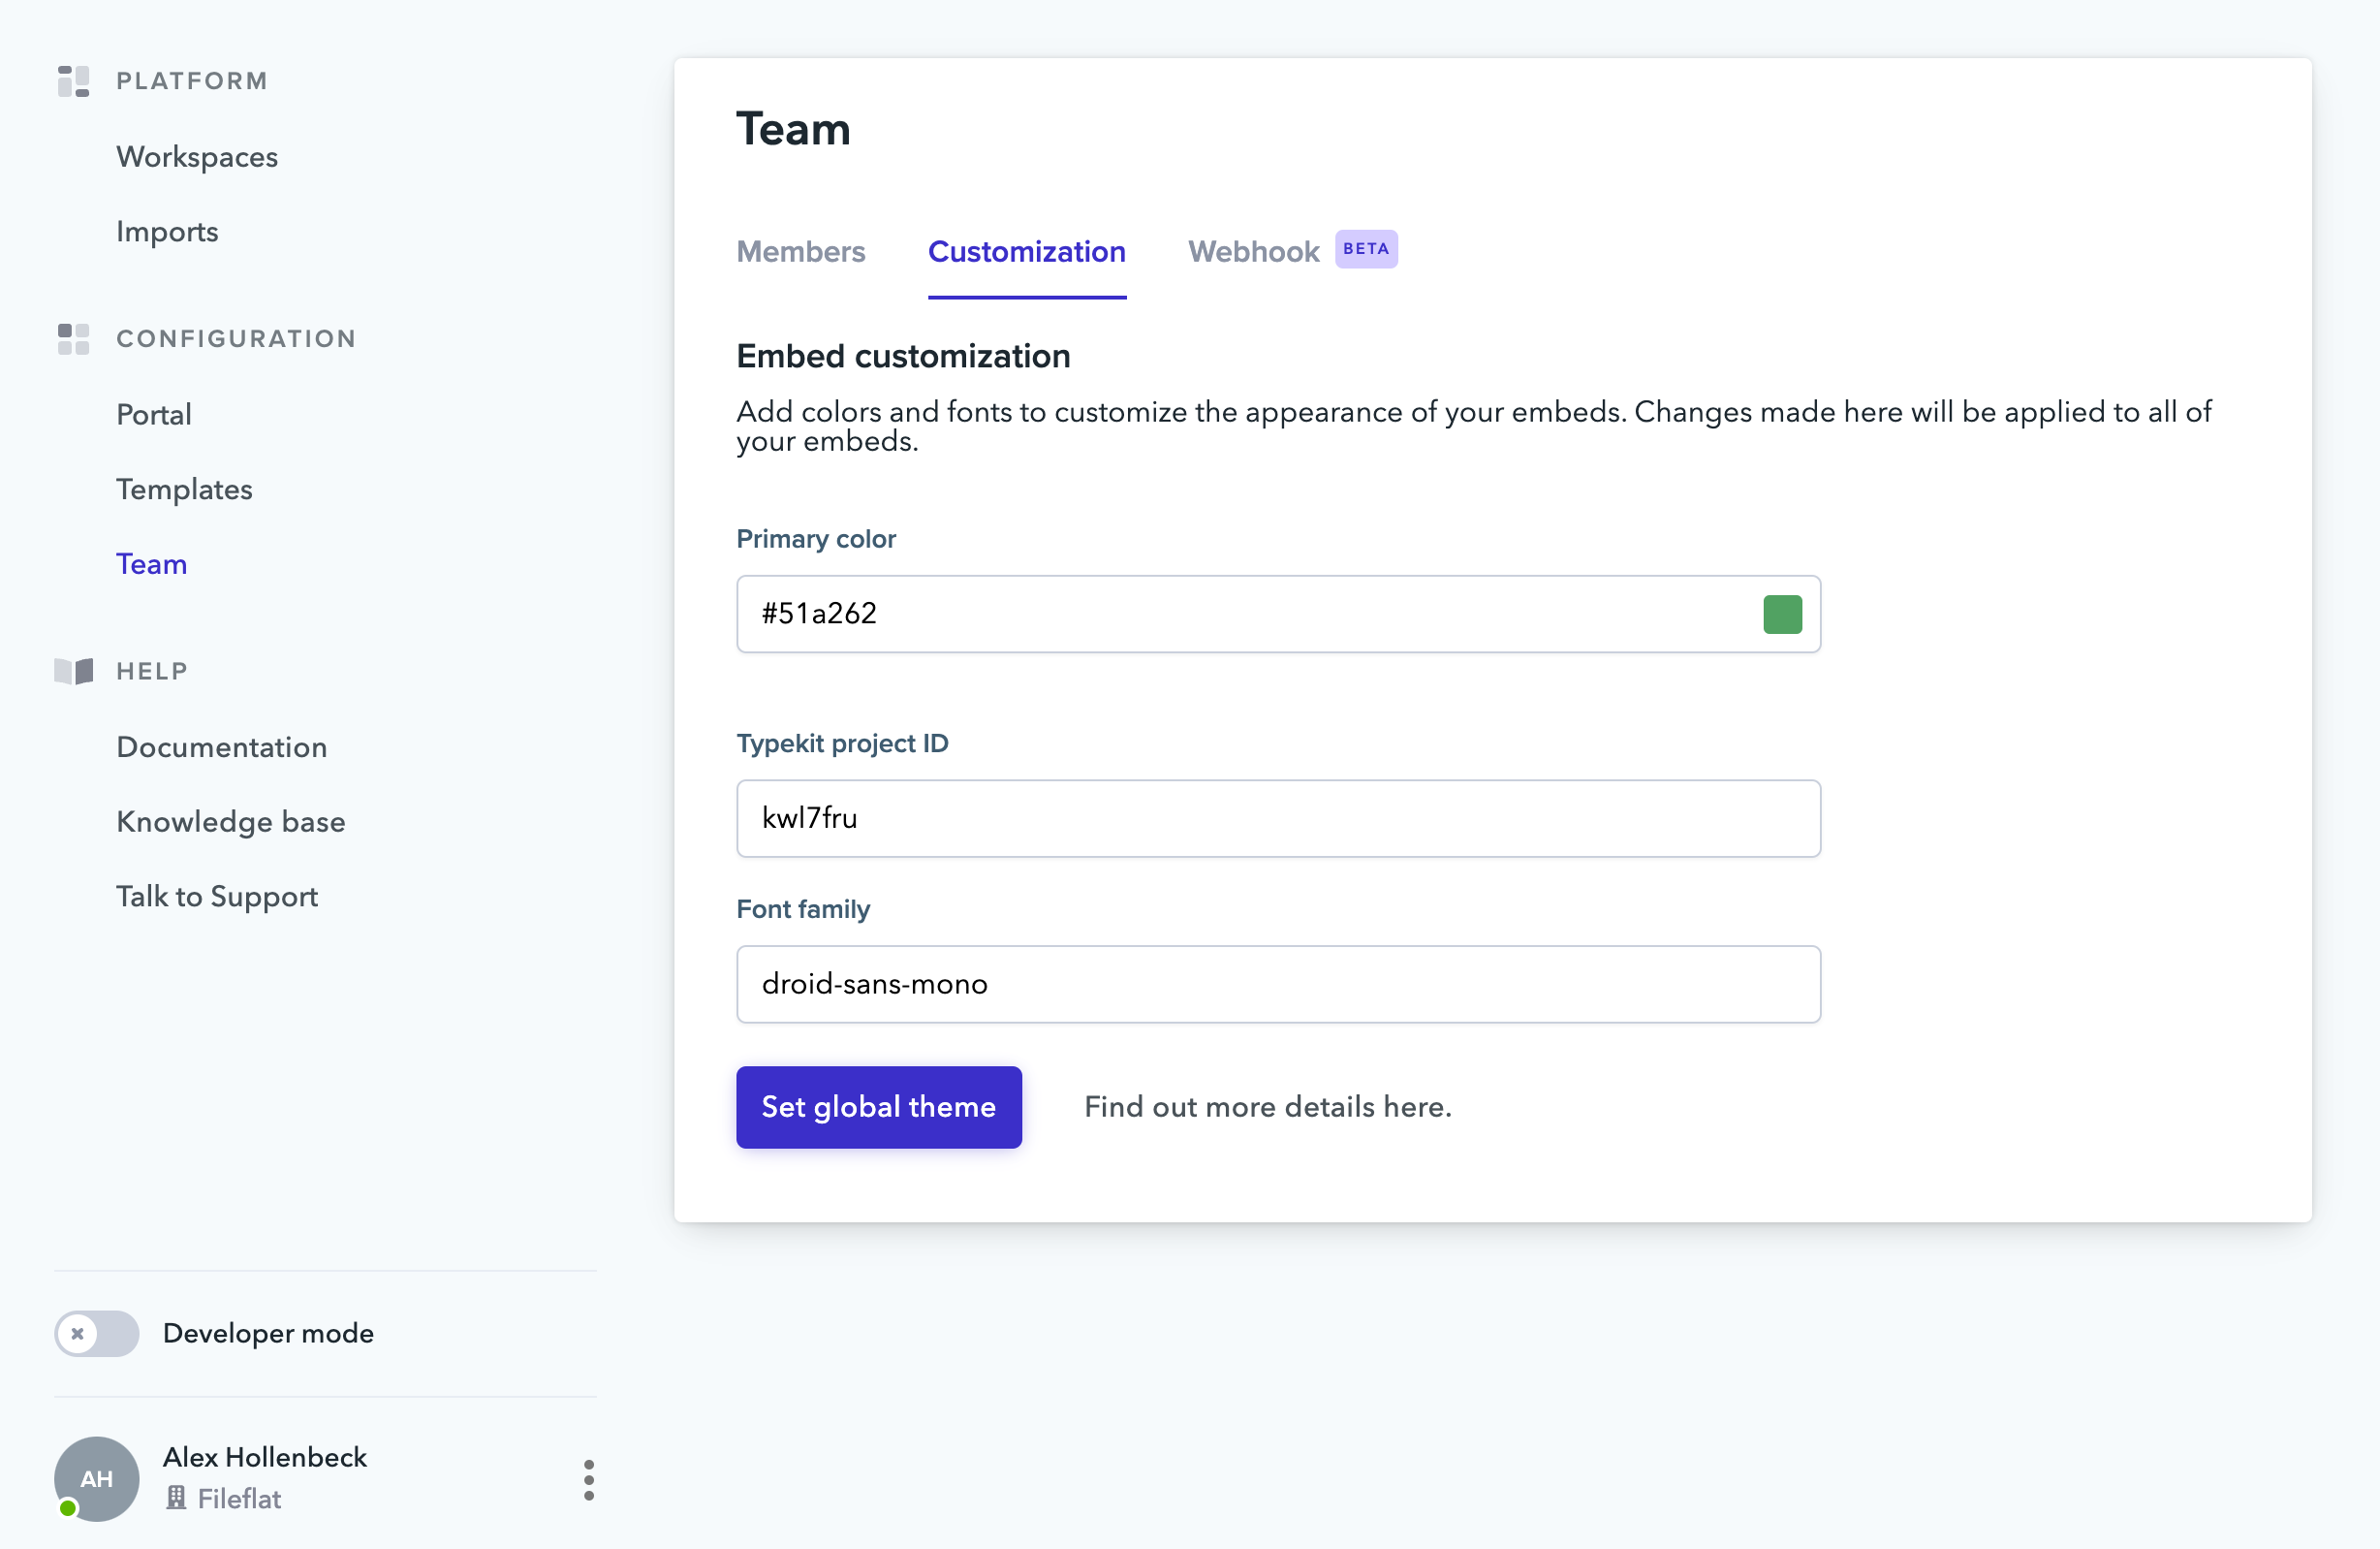
Global branding
To match your brand even more closely, you can apply a custom font and color to all your Portals from the Team section of your dashboard in the Customize tab. See this article for more information.
Environment Variables
Flatfile provides two different ways for dynamically making some data available in your Data Hooks® environment during an import session.
Server side
From the server side, you can add an env field to your token payload. This field should contain all the data that you want to make available in your Data Hooks environment.
const express = require("express");
const app = express();
const jwt = require("jsonwebtoken");

// This is a public Embed ID and a private key.
// Private key should be used to sign a JWT.
const EMBED_ID = "YOUR_EMBED_ID";
const PRIVATE_KEY = "YOUR_PRIVATE_KEY";

app.use(express.static("public"));
app.use(express.json());

app.post("/auth-flatfile", async (req, res) => {
  const token = jwt.sign(
    {
      embed: EMBED_ID,
      user: {
        /** YOUR USER INFO HERE */
      },
      org: {
        /** YOUR ORG INFO HERE */
      },
      // Here you can add whatever you want to send to your Data Hooks
      env: {
        foo: "Foo",
        bar: "Bar",
      },
    },
    PRIVATE_KEY,
  );

  res.send({ token });
});

app.listen(4242, () => console.log("Node server listening on port 4242!"));
Client side
There is also a way to send data to your Data Hooks env from the client side while an import session is running.
Flatfile.requestDataFromUser({
  onInit: ({ meta, session }) => {
    session.updateEnvironment({ foo: "Foo", bar: "Bar" });
  },
});
Accessing environment variables from a Data Hook
Within your Data Hooks, you can access enviornment variables using the session argument:
const MySheet = new Sheet(
  "MySheet",
  {
    email: TextField(),
    firstName: TextField(),
    lastName: TextField(),
    setFromEnvVariable: TextField(),
  },
  {
    recordCompute: (record: FlatfileRecord, session?: FlatfileSession) => {
      if (session?.env?.foo) {
        record.set("setFromEnvVariable", session.env.foo);
      }
    },
  },
);